How to Become a Flight Paramedic: The Complete Career Track
Learn how to become a flight paramedic. Read this step-by-step career roadmap covering clinical requirements, critical care certifications, and physical standards.
· 8 min read
Read →
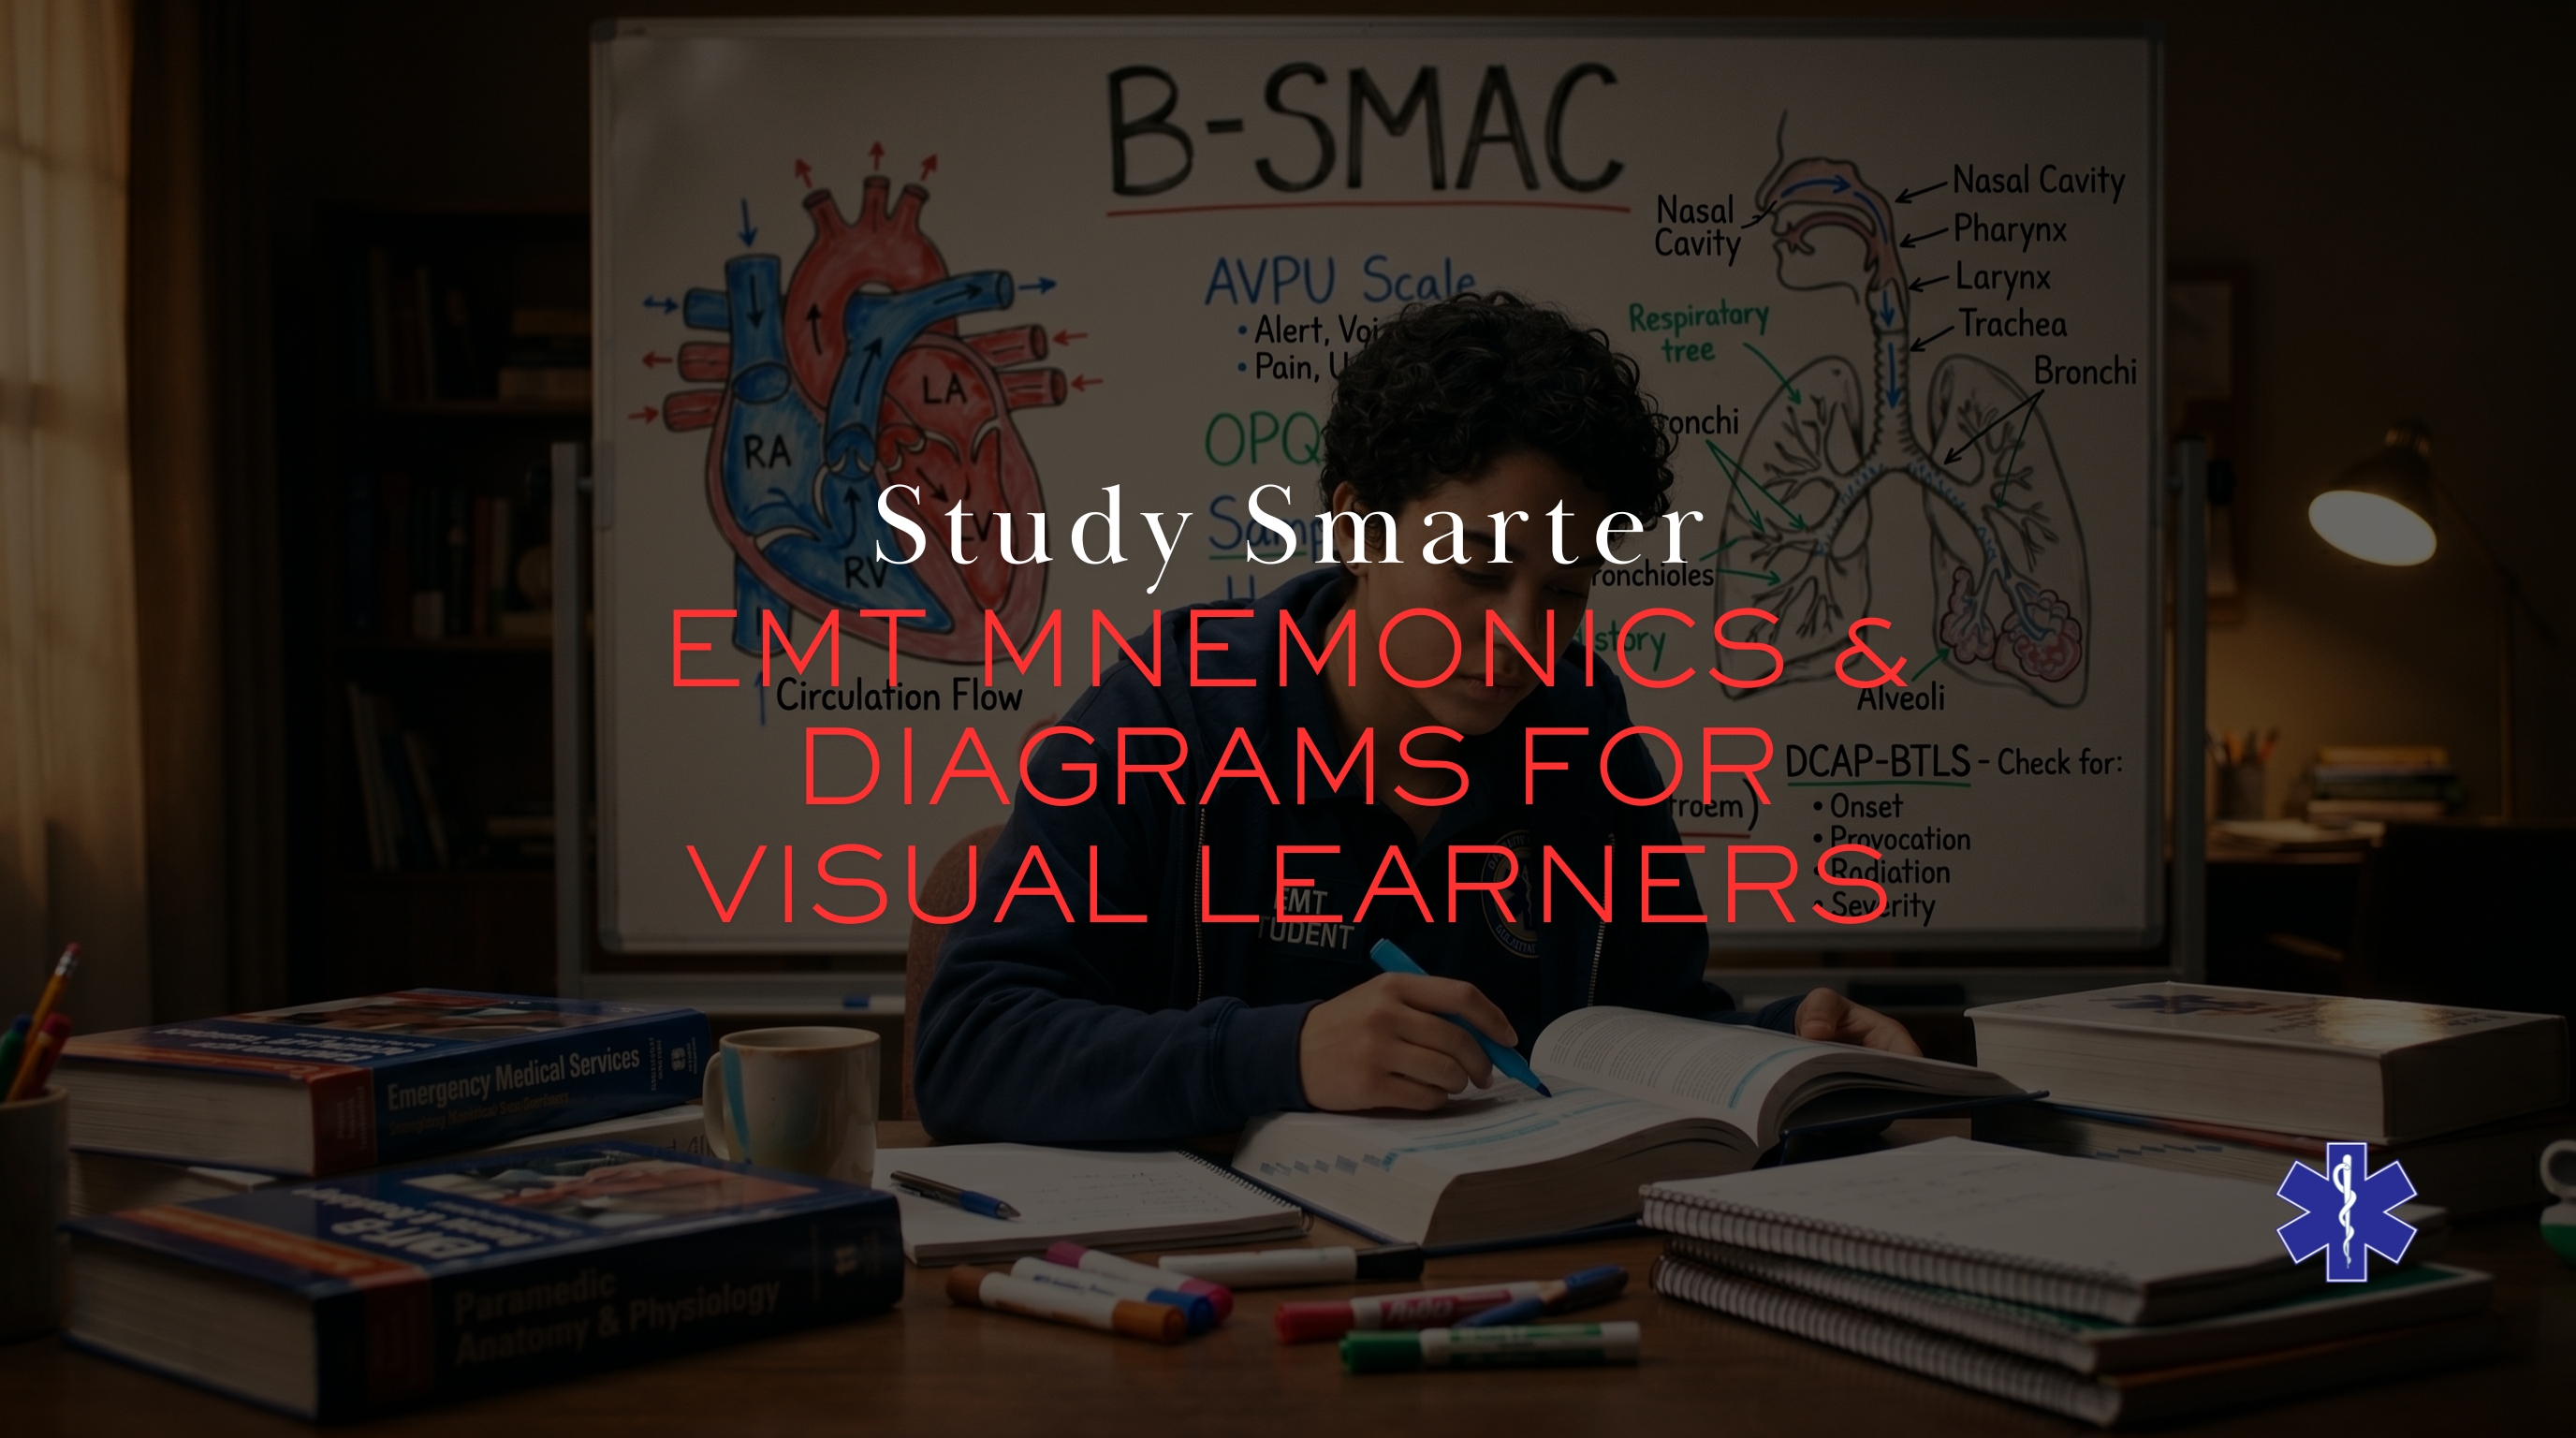
If you learn through imagery and spatial thinking, this EMT study guide is for you. Master patient assessment, cardiology, and high-yield mnemonics using diagrams, flowcharts, and visual frameworks built for the NREMT exam.
When you first open a standard EMT training textbook, the sheer volume of data can feel overwhelming. Pages upon pages of dense, clinical text detail everything from cellular metabolism to complex multi-system trauma protocols. For many students, simply staring at these massive walls of black-and-white text is a recipe for mental fatigue.
If your brain naturally processes information through imagery, shapes, spatial relationships, and colors, you are a visual learner. Trying to memorize the complex steps of emergency medicine by reading a textbook over and over will likely leave you frustrated.
In my experience as a field provider and instructor, the key to conquering EMT school is translating abstract medical concepts into concrete mental templates. When you are standing in the back of a moving ambulance with a critical patient, your brain will not scroll through paragraphs of text. Instead, it will search for a visual framework. This guide breaks down how to use spatial diagrams, conceptual mapping, and high-yield mnemonics to build an ironclad clinical memory.
Patient assessment is the absolute foundation of all emergency medical care. It is a highly structured, sequential process that you must execute flawlessly on every single call. Instead of memorizing a checklist, you should visualize this process as a literal roadway or flowchart in your mind.
Before you ever unbuckle your seatbelt at an emergency scene, your mind must establish situational control. Picture a massive, glowing neon warning sign at the threshold of the scene. This sign triggers your foundational baseline checks.
When gathering a history, do not view it as a random list of questions. Instead, imagine two distinct file folders inside a digital tablet.
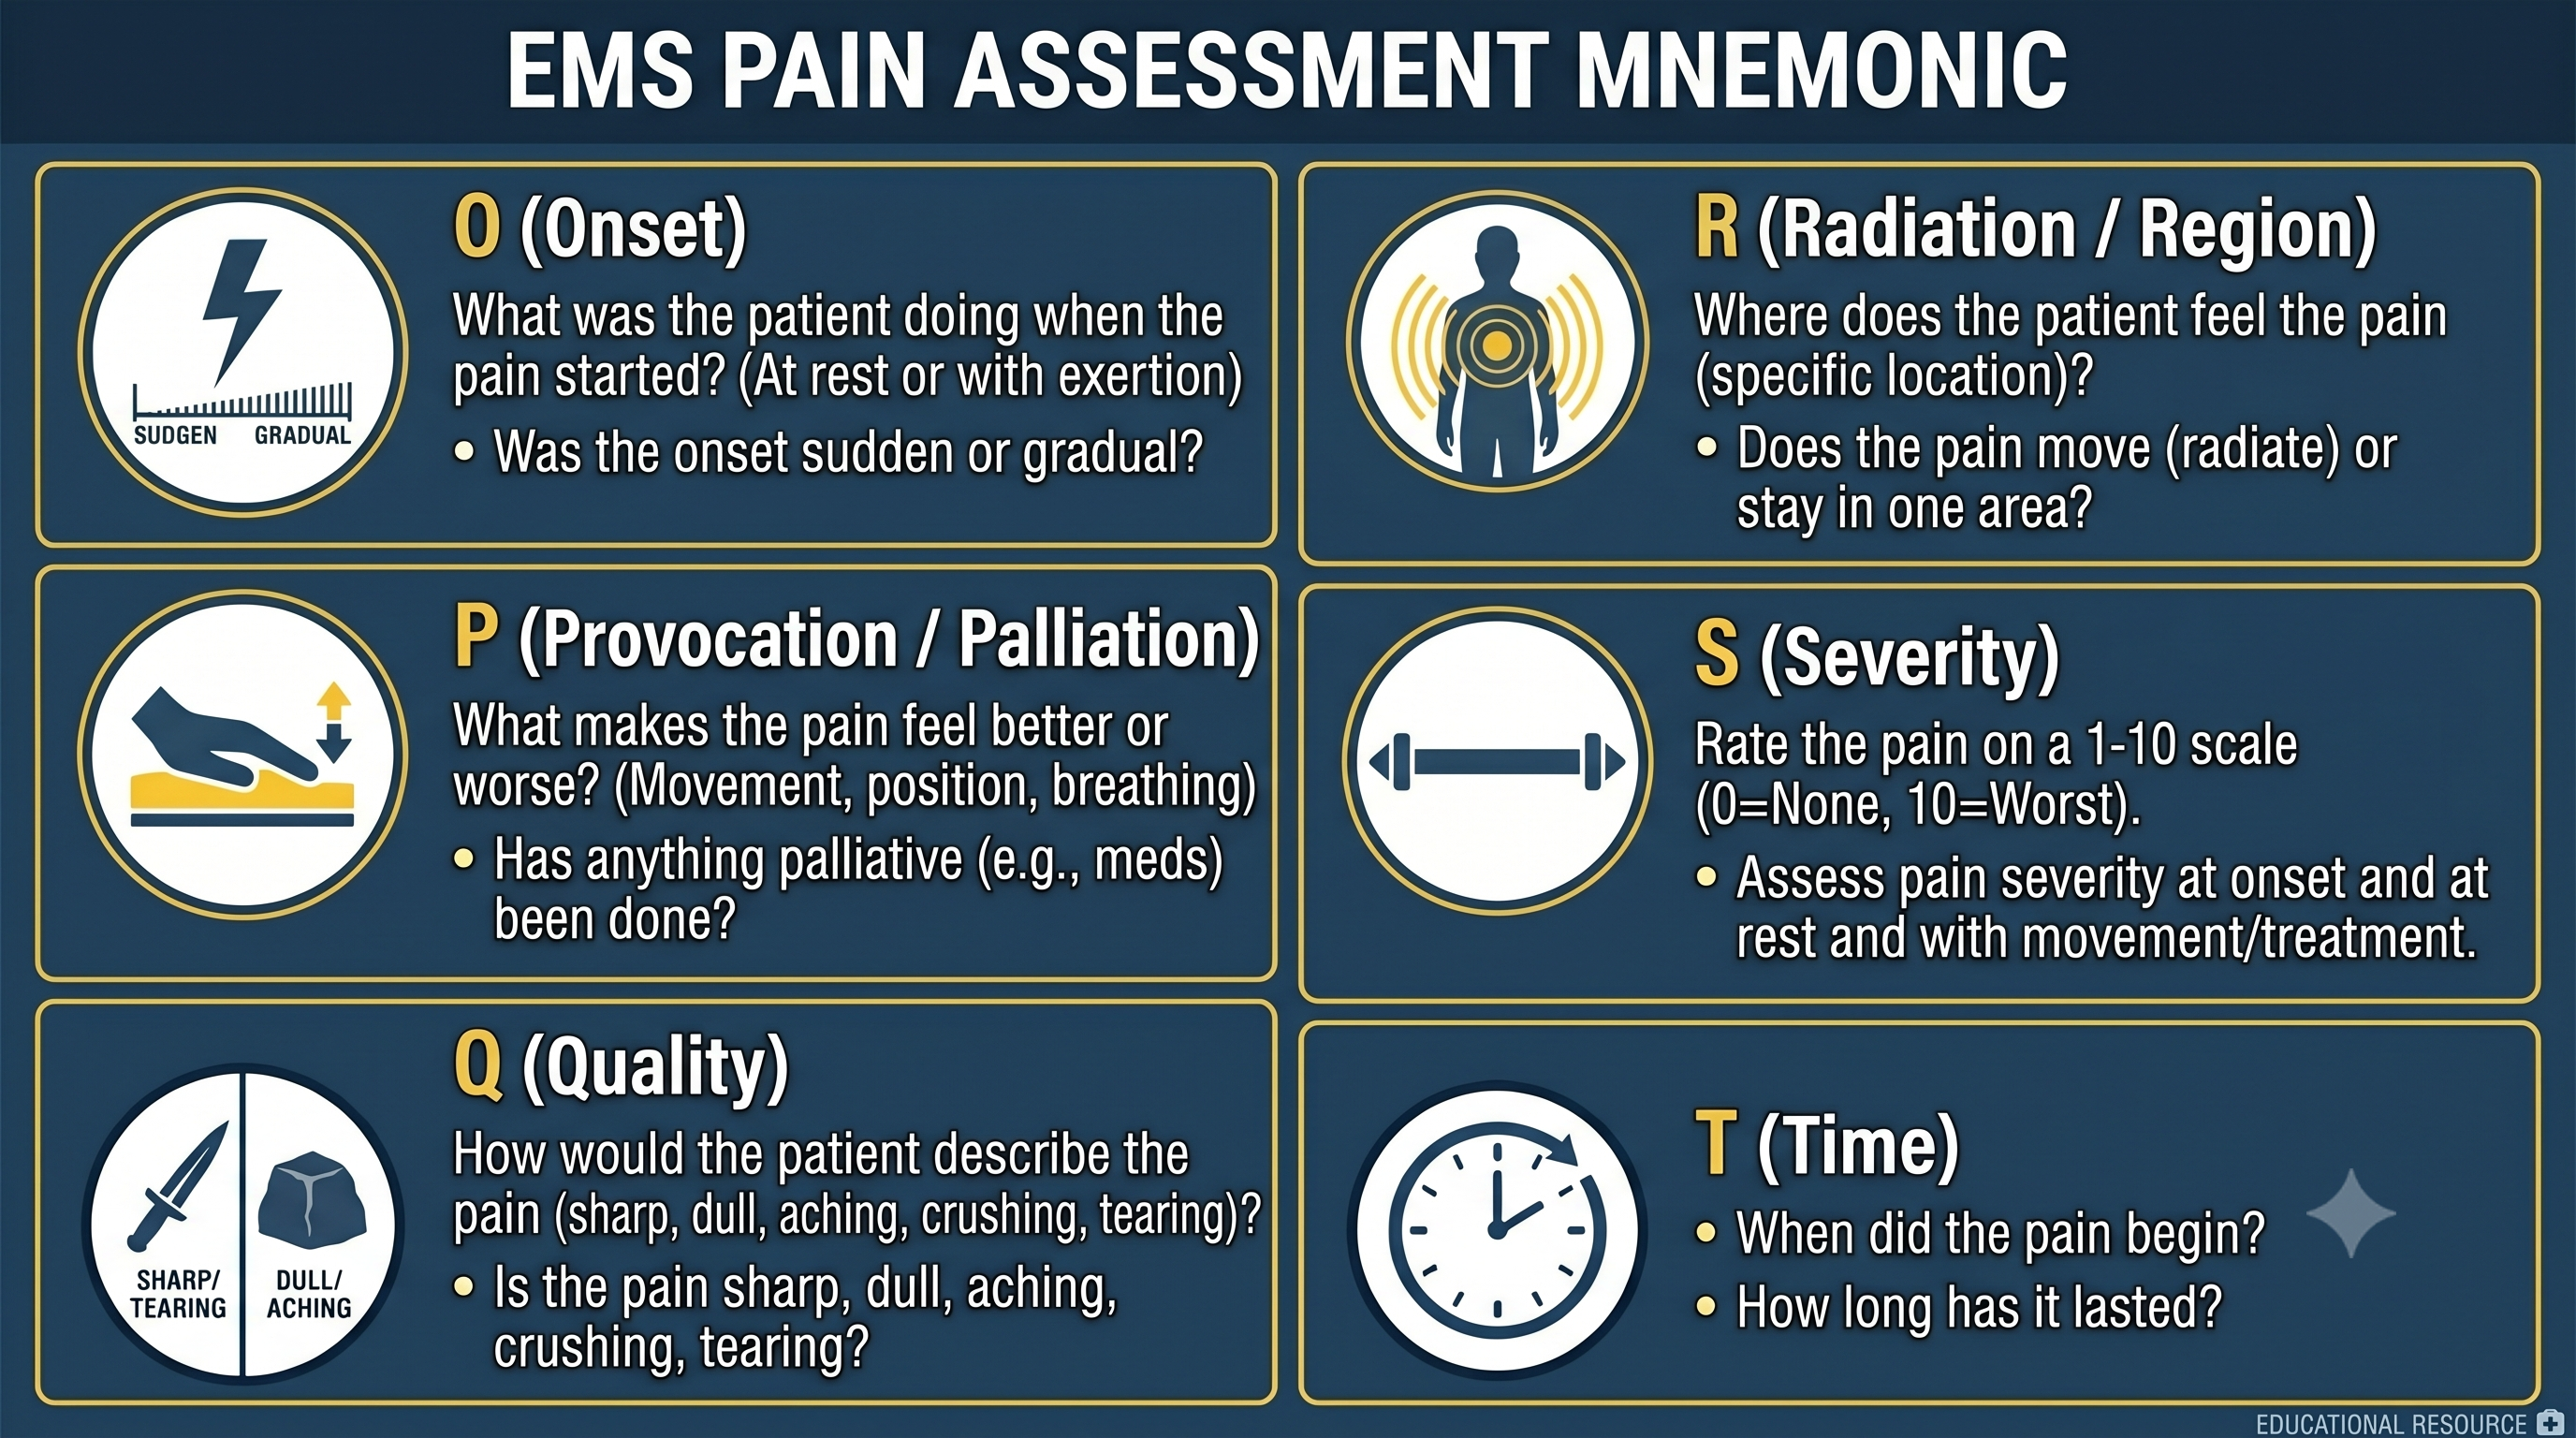
The first folder is the SAMPLE history, which forms the biographical blueprint of your patient. Group these details spatially in your mind. For a deeper breakdown of how SAMPLE works in practice, see our dedicated SAMPLE history and OPQRST guide.
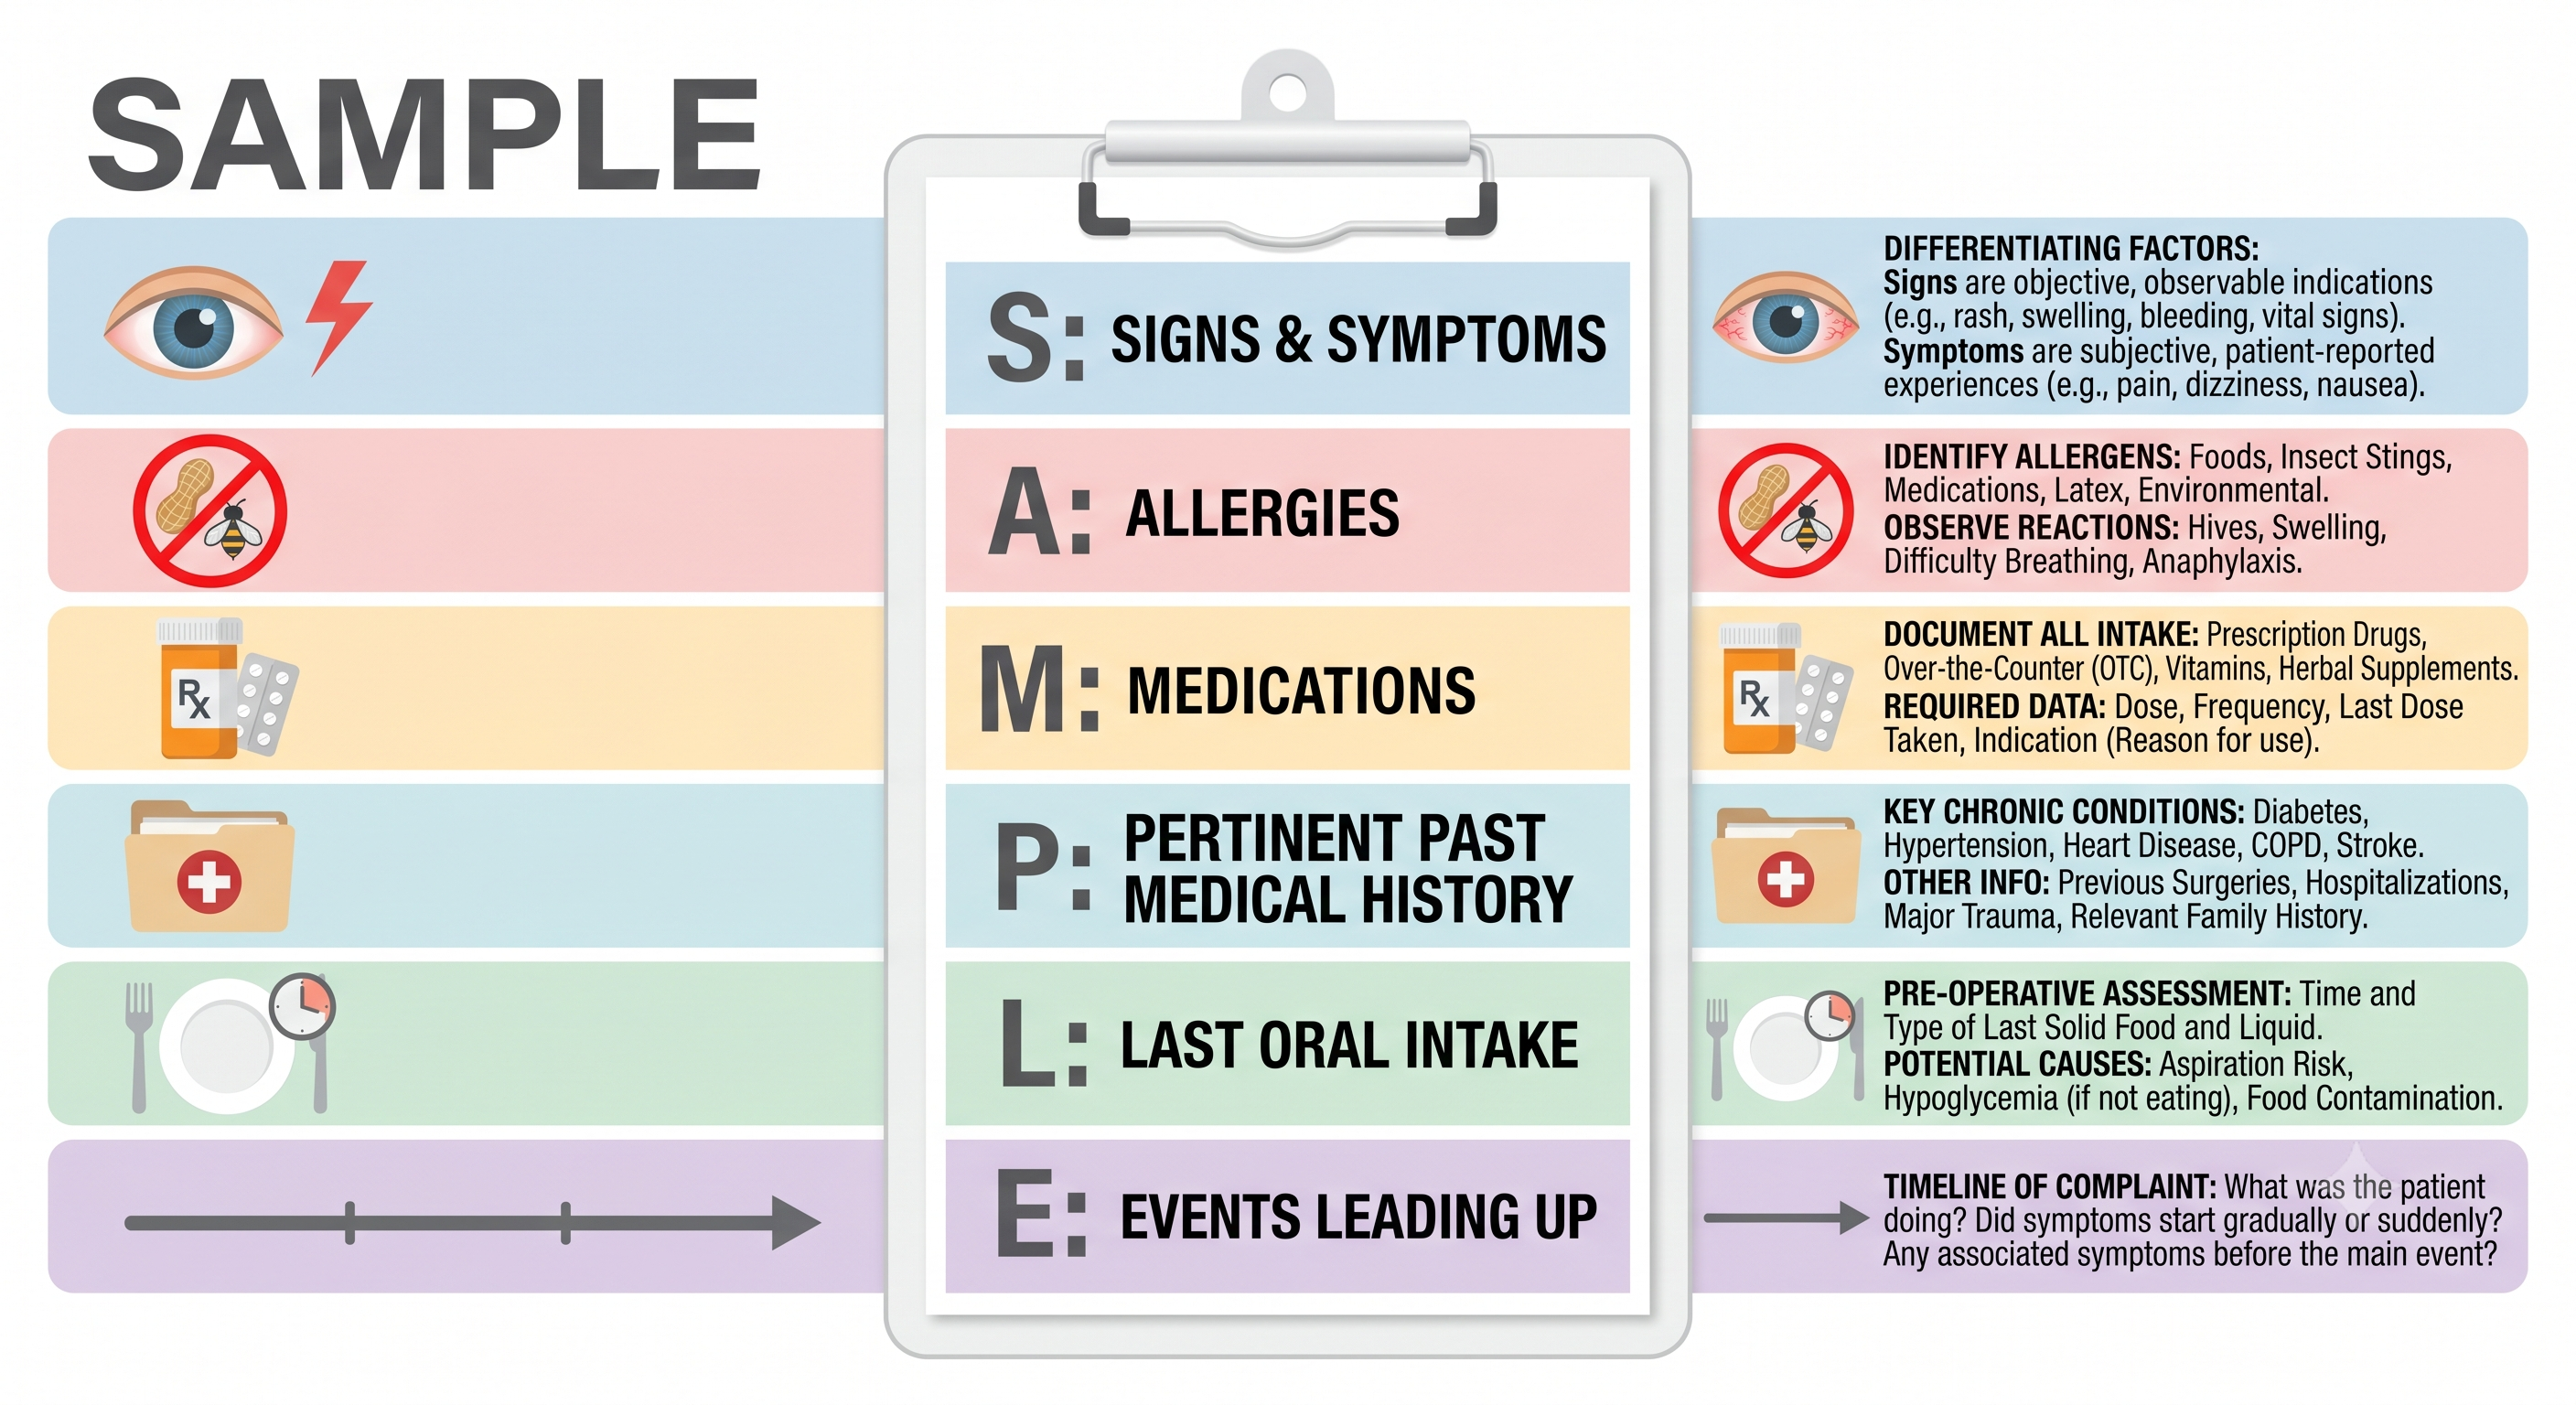
[S] Signs & Symptoms  --> What you see and what they feel.
[A] Allergies         --> Red flags for medications or foods.
[M] Medications       --> The patient's daily pill organizers.
[P] Past History      --> Historical surgical scars and chronic illnesses.
[L] Last Oral Intake  --> A clock face showing their last meal or drink.
[E] History Events    --> The timeline immediately preceding the crisis.
The second folder is the OPQRST matrix, which you should visualize as a target zeroing in directly on the patient’s physical pain or discomfort. SAMPLE tells you who your patient is. OPQRST tells you exactly what is wrong and where.
Visual learners often struggle with biochemistry and physiology because textbooks describe dynamic, moving processes using static words. To master these concepts, you need to draw them out as mechanical systems.
When studying airway management, stop trying to memorize the structures as a list of words. Instead, sketch the respiratory system as an inverted tree.
The trachea is the main trunk, splitting into the primary bronchi branches, and ending at the microscopic alveoli leaves.
When you study ventilation, visualize a pair of mechanical bellows. When the diaphragm moves downward, it creates negative pressure inside the chest cavity, drawing air inward. When you picture a patient suffering from an asthma attack, do not just think of the word “bronchospasm.” Draw a thick, tight rubber band snapping down around the airway branches, choking off the airflow and trapping air inside the leaves. This mental imagery makes understanding why a patient wheezes completely intuitive.
The human heart is one of the most heavily tested topics on the NREMT exam. Rather than memorizing the systemic blood flow textually, sketch a simple four-box grid on a blank piece of paper:
+-------------------+-------------------+
|                   |                   |
|  Right Atrium     |   Left Atrium     |
|                   |                   |
+-------------------+-------------------+
|                   |                   |
|  Right Ventricle  |   Left Ventricle  |
|                   |                   |
+-------------------+-------------------+
Color-code your diagram completely. Use a bright blue marker to trace the unoxygenated blood coming from the body into the right atrium and passing down through the tricuspid valve into the right ventricle. Draw an arrow launching that blue blood out to the lungs to pick up oxygen.
Then, switch to a vibrant red marker to show the fresh, oxygen-rich blood returning into the left atrium, dropping down through the mitral valve, and filling the thick-walled left ventricle. Finally, draw a massive red arrow showing that blood surging out through the aorta to feed the body. If you can sketch this diagram from memory in thirty seconds, you will never miss a cardiac flow question on a test.
For a deeper dive into how cardiac anatomy connects to real field emergencies, read our guide on the cardiovascular system for EMTs.
In high-stress field scenarios, toxicological and altered mental status emergencies can look completely chaotic. Mnemonics serve as mental sticky notes that organize your physical exam findings instantly.
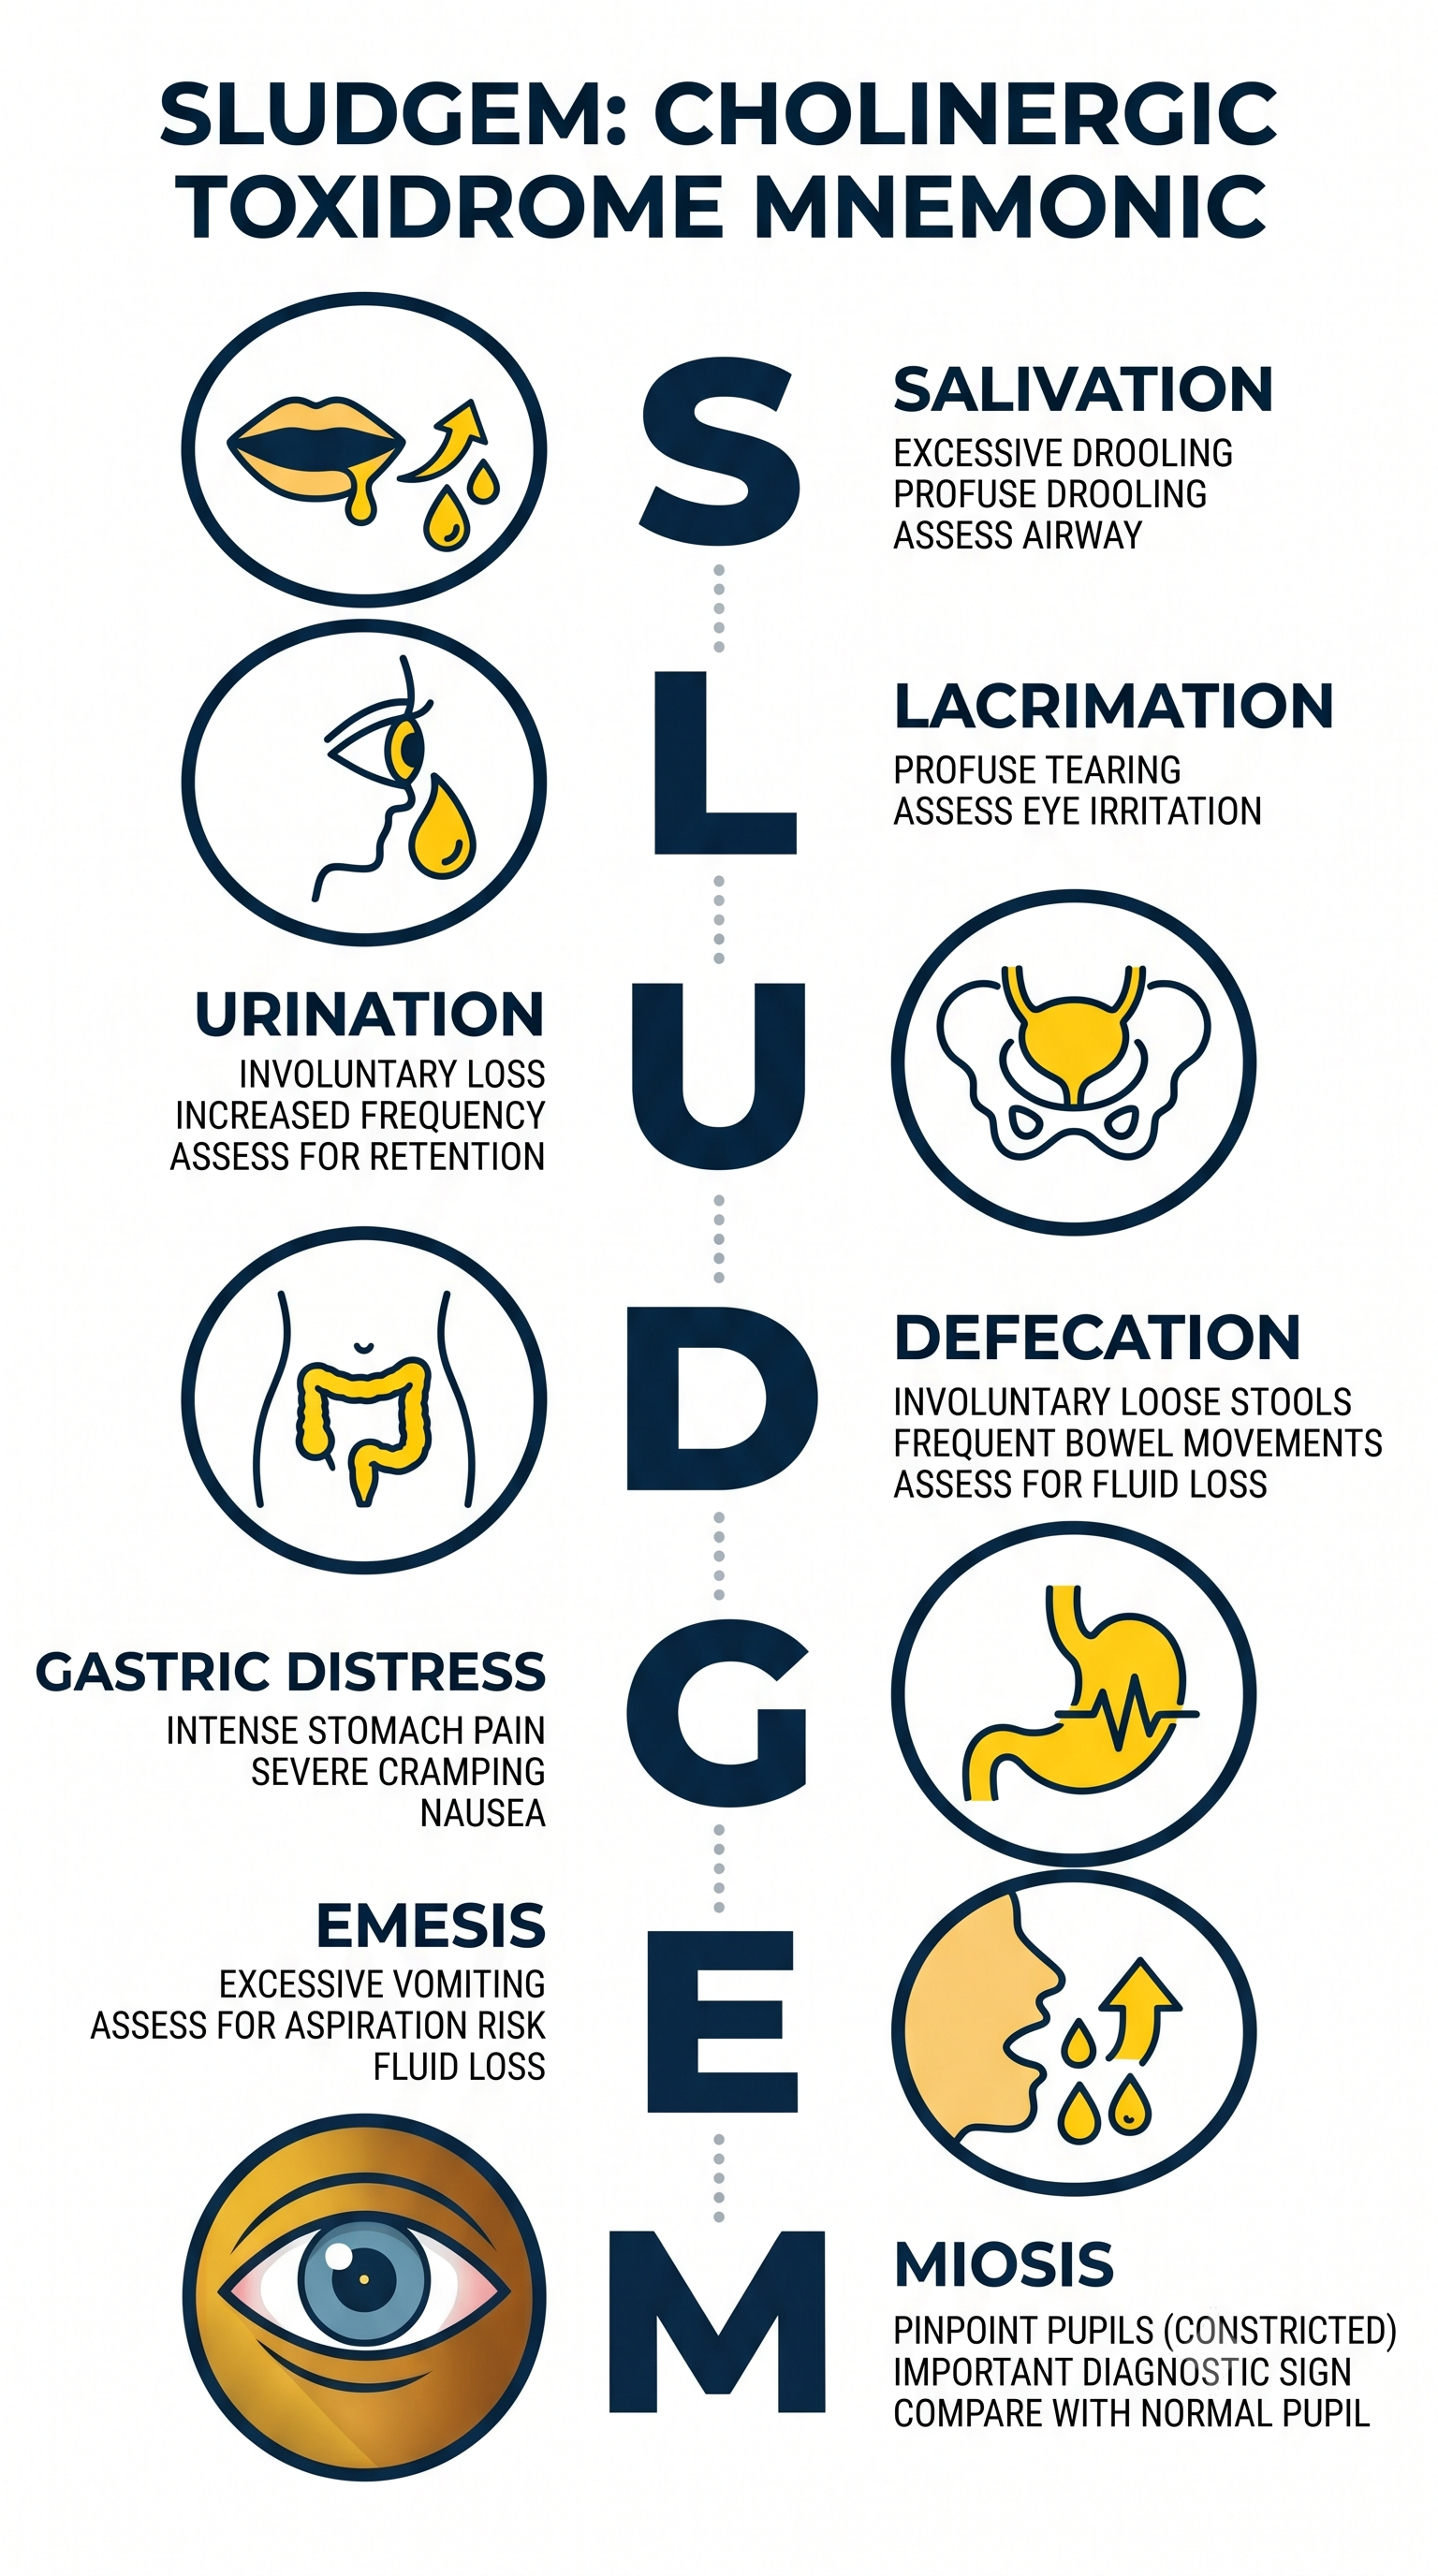
When a patient is exposed to organophosphates or nerve agents, their parasympathetic nervous system gets locked in the “on” position. To memorize this critical toxidrome, visualize a patient leaking fluids from every single part of their body like a broken plumbing fixture.
When you walk into a room and encounter a patient who is completely unresponsive with no obvious signs of trauma, the diagnostic path can seem vast. Visual learners should picture a bright, flashing neon sign in the ambulance displaying the vowels and consonants of the emergency alphabet.

[A] Alcohol       --> Smell their breath; look for bottles.
[E] Epilepsy      --> Scan for a medical alert bracelet or active seizure activity.
[I] Insulin       --> Check a rapid blood glucose level for extreme highs or lows.
[O] Overdose      --> Look at the pupils and scan the room for drug paraphernalia.
[U] Uremia        --> Consider underlying kidney failure or severe systemic waste buildup.

[T] Trauma        --> Run a rapid physical exam, hunting for hidden head wounds.
[I] Infection     --> Feel the skin for high fever; check for a history of sepsis.
[P] Psychiatric   --> Review their prescription medications for mental health histories.
[S] Stroke        --> Run a rapid neurological exam, looking for facial droop or drift.
When you reach the T for Trauma in AEIOU-TIPS, think of your DCAP-BTLS trauma assessment framework running in parallel — a rapid head-to-toe scan hunting for deformities, contusions, abrasions, and swelling that a patient cannot report because they are unconscious. When you reach S for Stroke, your neurological assessment protocol takes over immediately.
To maximize your academic results, you must transform your study environment into an active visual laboratory. Sitting quietly and reading will not cut it. For a full list of tools and resources to support your sessions, see our EMT and paramedic study resources guide.
Invest in a large, inexpensive dry-erase whiteboard for your study space. When you finish a chapter on trauma or medical emergencies, close your textbook completely. Attempt to sketch out the entire treatment protocol or anatomical system entirely from memory using different colored markers.
Once your sketch is finished, open your book and use a green marker to correct any omissions or structural errors. This physical act of drawing, color coding, and evaluating creates incredibly strong spatial pathways in your brain.
Commercial digital flashcard apps can be incredibly useful, but they frequently fail visual learners because digital text scrolling lacks a physical anchor. Instead, create physical, handwritten flashcards using plain index cards.
Keep your cards highly visual. On the front, draw a specific clinical sign, a simplified anatomical structure, or a core mnemonic title. On the back, write out the explanations using bulleted lists and spatial groupings rather than long sentences.
Front of Card:
+-----------------------+
|                       |
|       [B-SMAC]        |
|                       |
|   (Scene Size-Up)     |
|                       |
+-----------------------+

Back of Card:
+-----------------------+
| * BSI (Gloves/Goggles)|
| * Scene Safe?         |
| * MOI / NOI           |
| * Add. Resources?     |
| * C-Spine Control?    |
+-----------------------+
The physical act of holding the card, turning it over, and associating the information with your own hand-drawn imagery significantly enhances long-term memory retention. If you are looking for a quiet place to run these drills, our roundup of the best places to study near you has some practical options.
EMS training is a marathon, not a short sprint. If you learn differently than the traditional lecture-and-textbook model, do not fight against your natural learning patterns. Embrace them. By converting your textbook modules into clean flowcharts, vibrant anatomical sketches, and memorable mental imagery, you will stop struggling to memorize facts. Instead, you will naturally learn to think, reason, and act like an exceptional emergency medical technician.
For a full set of proven strategies to prepare for test day, check out our guide on how to pass the NREMT.
Visual learners retain material best by converting text into diagrams, flowcharts, and color-coded sketches. Techniques like whiteboard active recall, custom hand-drawn flashcards, and mnemonic imagery such as SAMPLE, OPQRST, and SLUDGEM are far more effective than passive re-reading of dense clinical text.
The most commonly used field mnemonics are B-SMAC for scene size-up, SAMPLE and OPQRST for patient history, SLUDGEM for organophosphate toxidromes, and AEIOU-TIPS for altered mental status. Each one organizes a complex clinical assessment into a memorable visual pattern.
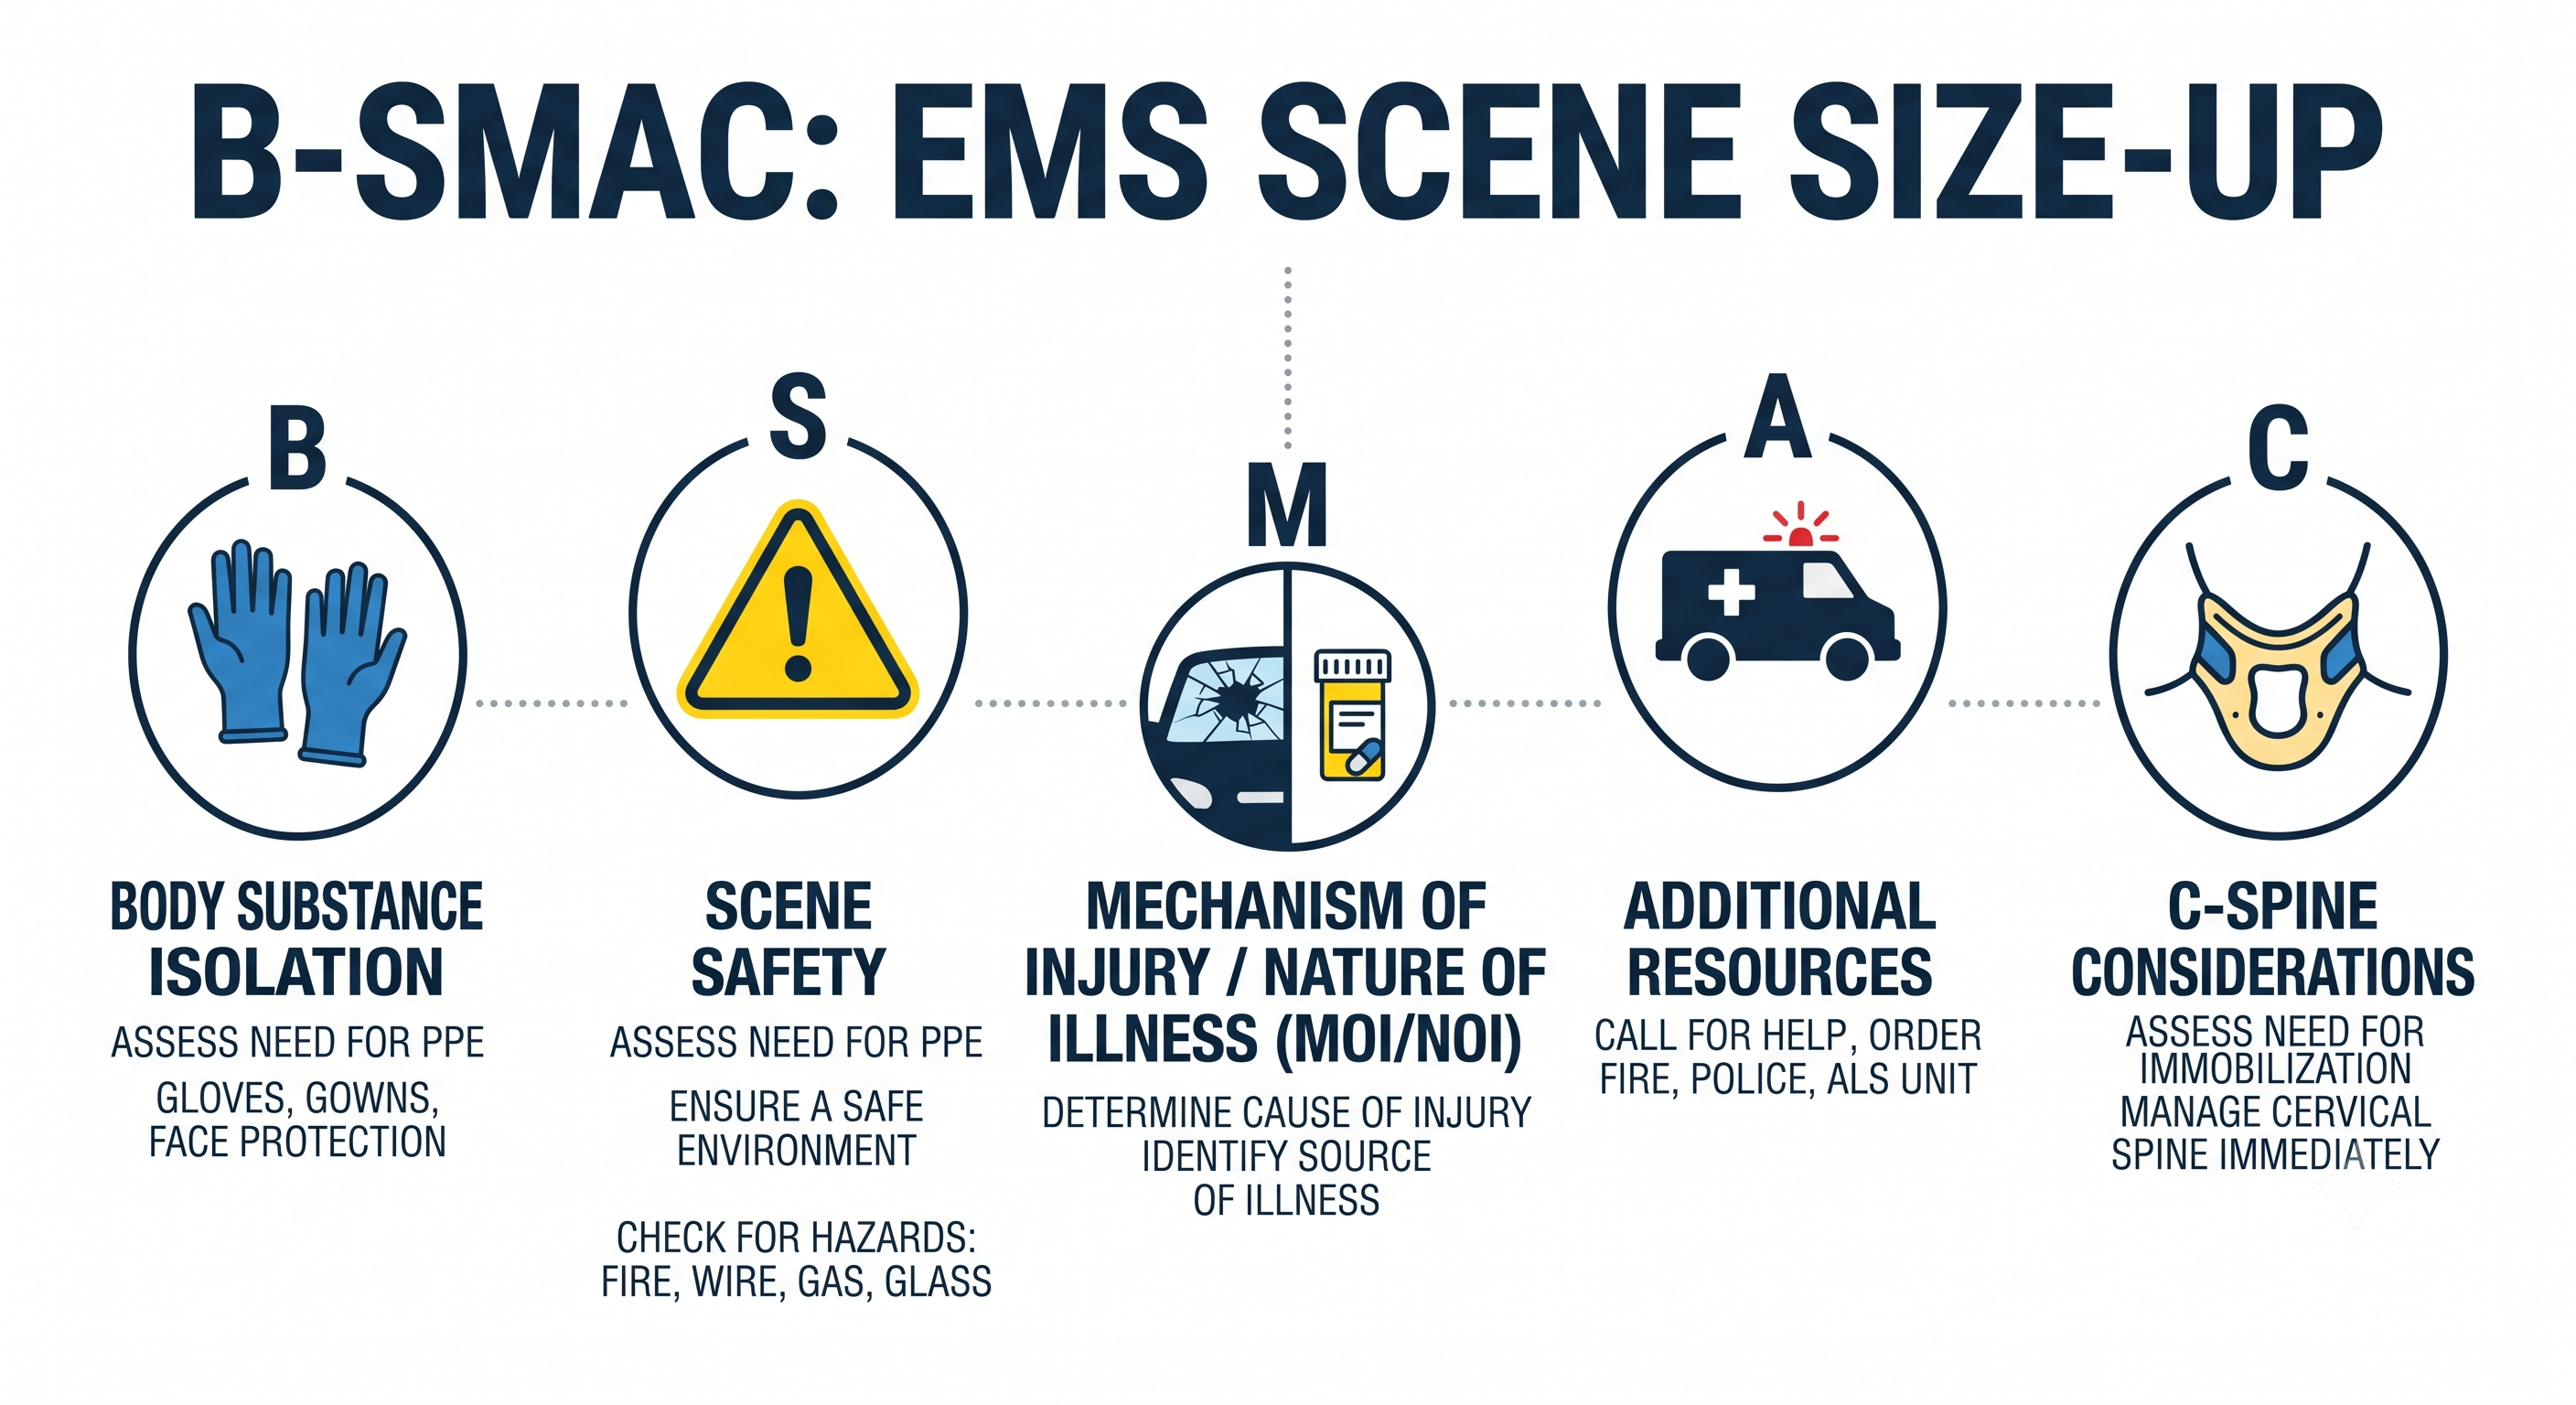
B-SMAC stands for Body Substance Isolation, Scene Safety, Mechanism of Injury or Nature of Illness, Additional Resources, and Cervical Spine stabilization. It is the mental checklist every EMT runs through during scene size-up before making patient contact.
Draw a simple four-box grid for the four chambers and color-code deoxygenated blood in blue and oxygenated blood in red. Trace the flow from body to right atrium to right ventricle to lungs to left atrium to left ventricle to aorta and back to the body. If you can reproduce this diagram from memory in thirty seconds, you will not miss a cardiac flow question on the NREMT.
AEIOU-TIPS is an EMT mnemonic used to systematically investigate the causes of altered mental status in a patient with no obvious trauma. Each letter represents a potential cause: Alcohol, Epilepsy, Insulin, Overdose, Uremia, Trauma, Infection, Psychiatric, and Stroke.
The NREMT CAT can feel abstract for visual learners because it is text-based. The key is to build strong visual mental frameworks during your study period so that when you read a question, your brain retrieves a diagram rather than a paragraph. Mnemonics, color-coded anatomy sketches, and flowchart-style review sessions are highly effective preparation strategies.
About the Author
Veteran EMT with 13+ years of field experience in EMS. I built EMT Training Station to give aspiring first responders the honest, practical information I wish I'd had when starting out — covering training, certification, gear, and career advancement.
Learn how to become a flight paramedic. Read this step-by-step career roadmap covering clinical requirements, critical care certifications, and physical standards.
A veteran responder's guide to writing an EMS resume and passing the oral interview. Includes resume templates, certification checklists, and practice questions.
Learn how to become a firefighter EMT. Read this step-by-step career track guide covering EMT certification, CPAT fitness testing, and fire academy prep.